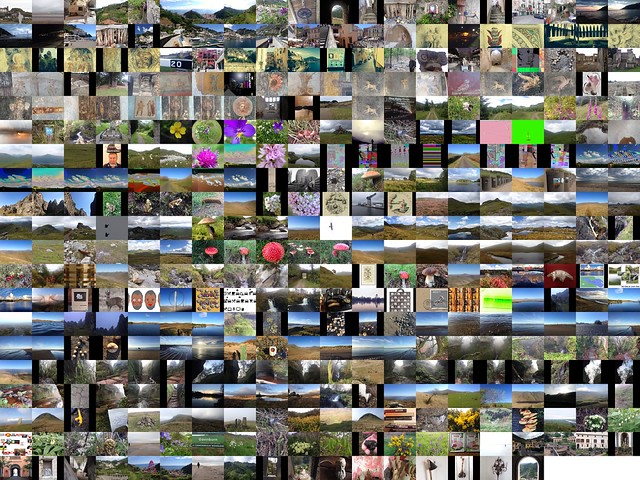
A few years back I used pummelvision to make a video of all of my flickr photos. Pummelvision was an online service where you pointed it to your flickr stream and it built a video for you and posted to vimeo. It could also take input from tumblr and facebook.
I though it might be interesting to make a similar video for my photos this year. However going to look for pummelvision drew a blank, the company had closed. I then though It might be interesting to try to create a similar video. From my memory and looking at my old video, pummelvision made a video with no transitions and very fast. As far as I remember it just used one tune. I downloaded my old video from vimeo and extracted the audio file using QuickTime pro. I took a guess that the frame rate was about 6 photos per second.
Grabbing the images
I guess there a few ways to grab all your photos from flickr, but this is how I did it. If I was doing it frequently I’d look into automating it, but this was a once off, or once a year if I do it again.
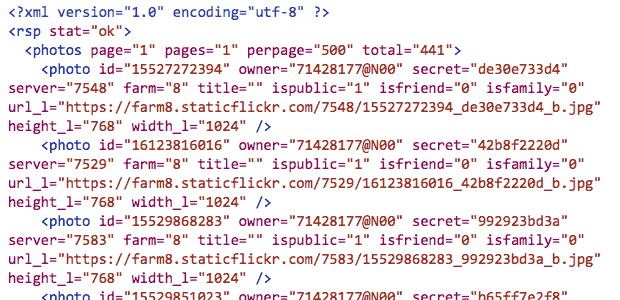
Flickr’s api would allow you to do this, but it seemed a bit excessive to try and write a pile of code. The Flickr API has a section to test all of the command so I headed to: Flickr Api Explorer – flickr.photos.search. There I put my own user ID in, set the min_date_taken and max_date_taken, increased the per_page to 500 and added the large photo url to the extras field.
This produced an xml file will all the information:

I then extracted the 397 urls from the text. There will be many ways to do this, but I am experimenting with the Sublime Text application at the moment, it found & selected all of the https: occurrences and the with cmd-shift-right arrow expanded the selection to the quotes. One copy got all of the files!
Once I had a list of urls I edit those so that each line was:
curl "https://farm4.staticflickr.com/3897/14598292323_ae6462fa07_b.jpg" > image_183.jpg
With the numbers out the image sequential and padded to 3 characters, eg image_001.jpg, image 002.jpg etc. I also numbered then in reverse so the oldest photo would be first.
I saved this text as a file, dl.sh and moved into the terminal:
cd path/to/thefolder
chmod +x dl.sh
./dl.sh
This code set the dl.sh file to executable and then ran it, the terminal filled with text and the folder with images. Curl is the command-line tool for downloading files.
Sizing images
Downloading the large size gave a folder full of images but some where landscape and some portrait, ie 1024 × 768 or 768 x1024 I need the images to all be the same size. So i used the sips utility to first resize them, sips --resampleHeight 768 *.jpg, then to pad the portrait ones: sips --padToHeightWidth 786 1024 *.jpg
Which gives me pictures like this for the portrait ones:

Making the movie
I discounted using iMove, moviemaker or the like as I wanted something quick (not necessary quick this time…) and that could be automated. I am also not sure in iMovie can show as fast as 6 per second. (Update, a quick look shows iMove can set speed to fractions of a second per frame.)
I though of a couple of ways to make the move, using Quicktime pro or ffmpeg. Quicktime pro proved the easiest option, opened the app and File -> Open Image sequence…, choose 6 frames per second, then all I had to do was save the movie.
Unfortunately Quicktime pro has been replace by Quicktime and it is a bit of a bother to get your old QT pro working if you had paid for a license. So I though I’d figure out ffmpeg too.
With great power comes great complexity
FFmpeg is A complete, cross-platform solution to record, convert and stream audio and video. It is a command line application and has a lot of variables. I can usually find out the right command with a bit of google. This one took quite a lot of google and failures. Most of these failures came from me trying to set a framerate, which lead to skipped frames. Eventually I dropped the idea of using the framerate options and got a very (too) fast video with this:
ffmpeg -f image2 -i IMG_%03d.jpg -c:v libx264 -pix_fmt yuv420p out.mp4
Note to self, in the -i, iput option IMG_%03d.jpg means all the images with 3 numerals, eg 001, 002… 375
I then slowed it down a little with this:
ffmpeg -i out.mp4 -filter:v "setpts=4.0*PTS" 2014-flickr-show.mp4
And added the audio:
ffmpeg -i 2014-flickr-show.mp4 -i pum.mp3 -map 0 -map 1 -codec copy -codec:a aac -strict experimental -b:a 192k -shortest 2014-flickr-show-audio.mp4
It took a fair bit of google to get the audio right too, the -codec:a option seems to sort things out.
Whys and Wherefores
As noted above, I could have done most of this with iMovie. But by using ffmpeg or QT pro, I’ve the opportunity to play, learn and possibly end up with an automated system. It would seem well within the realms of possibility to have a script that used the flickr api to download a bunch of images, perhaps for a year or with a tag and make a movie from them.
I’ve now figured out how to do most of this by piecing together the above fragments and finding out a bit about loops and renaming files, but I’ve no idea of how to create a bash script that will replace my hard coded tags, usernames ect with input, more to learn.

